Pan/Tilt/Zoom (PTZ) Settings
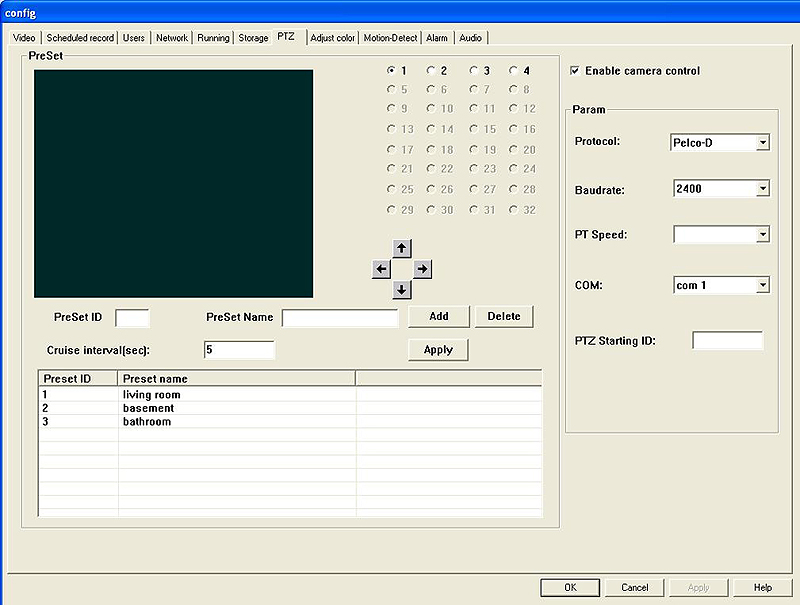
Click bitmap button Config and select PTZ to enter the PTZ panel:
Step 1: Set "Enable camera control" to the checked state.
Step 2: Set the Protocol (if your PTZ camera was purchased from eDigitalDeals, this should be set to Pelco D)
Step 3: Select a baudrate (if your PTZ cameras was purchased from eDigitalDeals, this should be set to 2400)
Step 4: Com should be set to "Com 1" if you purchased DVR Card(s) from eDigitalDeal for installation in YOUR OWN computer. If you're setting up your PTZ camera with an eDigitalDeals SERVER purchased after December 2007, then this should be set to "Com 2."
Step 3: Click "Apply" in the lower right corner.
You should now be able to click on the grey arrow buttons to change move your PTZ camera.
PTZ & Cruise
You can set up presets for your PTZ camera for easy access on the Main Screen. For instance, you could focus your PTZ Camera on your backyard and create one preset, then focus the camera on your front yard and create a preset. Once you've created presets, they're accessible on the main screen when right-clicking on the screen for your PTZ camera. You can even set up different presets for different PTZ cameras.
In addition, you can have the PTZ camera "cruise" between the different presets you created. The PTZ will cruise between the different presets until you stop the process. You can even program the amount of time you'd like the PTZ camera to stay at each preset. Here's how to create presets and cruise between them:
Note: If you have more than one PTZ camera, choose the camera's ID number in the upper right of the Preset section. You can create presets for up to four PTZ cameras. If you only have one PTZ Camera, the default is "1," so no changes need to be made in this section.
1. Focus the camera on the location you'd like to create a preset for.
2. Next, give the camera a unique ID number in the "PreSet ID" field. It is very important that you do this BEFORE giving the preset a name.
3. Give the preset a name by typing one in the "PreSet Name" field.
4. Click "Add."
5. Repeat steps 1 through 4 until you've created the desired number of presets.
6. To set the amount of time the PTZ camera stays on each preset, enter a number in the "Cruise Interval (sec)" field. The number will represent the number of seconds the camera remains at each preset location.
7. Click "Apply" in the lower right corner, then click "OK" to return to the Main screen.
To access your presets, right click on the square for the PTZ camera, on the Main screen. You should get a menu that looks like the one below:
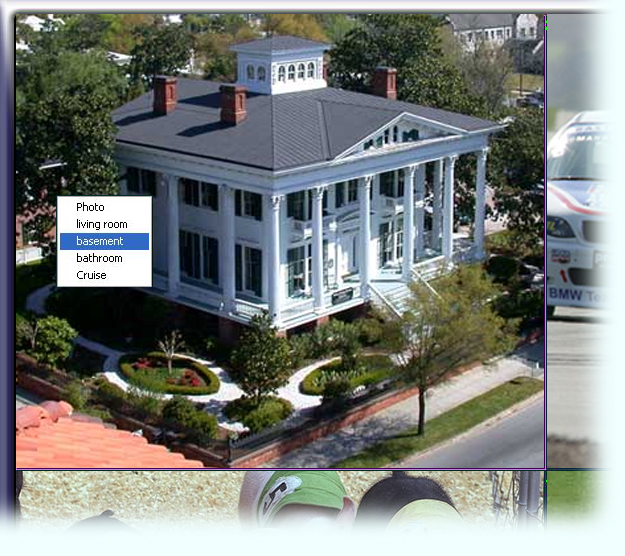
Simply select a preset, and your camera will move to that location. To cruise between all your presets, select "Cruise" and the camera will cycle through all of them in a loop.